Friday, January 13, 2017

Christmas Tree Lot (Money Gift)

I made this cute tree lot to give my dad for Christmas. I bought my supplies at Hobby Lobby. I had seen an idea like this on Pinterest, but there were no instructions on how to do it.
I got a box from a grocery store and cut my foam to fit it. I googled how to fold a tree out of money and found a tutorial on YouTube. I wasnt sure how to get them in the lot so I used a razor knife and cut lines and pushed the trees into them. That worked for the most part. I took skewers and cut them to the height I wanted to string the lights from. I alternated lights and sequins. I loved how it turned out. It took me a long time to put it together but I was in love. I made it a couple of weeks before Christmas and I noticed the trees started to all lean forward. I am not sure how to fix that but I might try taping them on the back to hold the folds closed. That might help? Not sure
Thanks for visiting!


Wednesday, May 25, 2016

Graduation Gifts

I guess it has been a minute since I have posted on this blog. It is graduation time next week and I have been working on gifts. I used this tutorial on You Tube to make money roses. I am pleased with how mine turned out. I had a florist arrange them in a vase for me. 


 The lighting wasn't the best, but you get the idea.
I have made money roses before but this was the first time I have used this tutorial to make them. I have also made the cap and gown for the bottle before as well. You can find instructions for this on Pinterest
If you are here, thanks for stopping by!

Saturday, October 17, 2015

Altered Halloween Book

I found the instructions on how to make these books on Pinterest. (or you can find it directly here). I thought it would make a cute Halloween decoration, but I also wanted to make it into a scrapbook so you could actually look through the book. I divided my book into sections for how many pages I wanted in my book. I paper clipped the sections together.I kept the first and last page of each section and tore out the middle pages, then I glued the front and back page of each section together to form one page. This is my end result.
I decided I would try the spiderweb for my cover. I just made the spider web out of hot glue. I used stickers for my letters but they probably weren't thick enough. I would probably use thicker letters because when I highlighted the high spots with the metallic paint, I could not get just the letters to highlight. I had to paint over them and it was kind of hard to see their outline. Overall, I like the book.


Here's a peek at the book with the inside pages.


Here are the inside pages


Friday, September 18, 2015

Idea for how to turn down a high school dance date

My son was asked twice in the same day for the same girl's choice dance. We have always told our kids to go with whomever asked first. He felt bad that he had to say no to one of them. This is what we came up with to answer.


He hand wrote a note that says he is "blue" that he cannot go to the dance with her because he had already been asked.


Wednesday, August 19, 2015

Missionary coming home

My son recently returned home from serving a mission. I decorated our door for the event. I am happy with how it turned out.


Friday, June 26, 2015

Crochet

I have been in a crochet mood lately. I find it hard to crochet unless I am in the mood. I started making dishcloths, but found some coasters on pinterest. I made them and dishcloths to match. The dishcloths look like hot pads...oh well.


Not the best picture, but you get the idea.

Friday, June 5, 2015

Gifts

I made these for graduation gifts again this year. I think they are so cute


I also did these. I bought the wrappers on Etsy


I have a co-worker that is moving so I made this suitcase for her. I put travel games and treats inside.


Friday, May 29, 2015

Wedding Gift

I wanted to give money for a wedding gift and was trying to think of a cute way to give it. I remembered I had purchased the pattern to make this car gift card holder and thought it would be perfect to hold money too.


The money (or gift card) goes in the trunk. Cute huh?

Sunday, April 19, 2015

Flower Coasters

I saw a link to the pattern to make these coasters on Facebook. I thought I would give them a try. My first one I followed the pattern exactly, but it left a hole in the middle of the flower. I made the second one but I started with a magic ring instead of how her directions had me start it and no hole in the center.


They were easy to make and I like them. My husband on the other hand wasn't so sure about them. He didn't think people would know that they were coasters and he wondered if anyone would use them. Tell me your thoughts. Would you know? What is a cute way to tell someone it's a coaster if you gave as a gift? Would you use them if you got them?


Thanks for stopping by.

Sunday, March 1, 2015

Amigurumi Spring Bunny

I think I am obsessed with crocheted animals. I think they are so cute. This pattern is by A Morning Cup of Jo and its really easy...until you assemble. Like the reindeer I made earlier, I struggle a little to put it all together. Ive gotta figure out an easier way.  But, despite my struggle, I love the bunny. Cute huh?


Monday, January 12, 2015

I like to try things I find on Pinterest. I found an idea for cleaning grout. I've found several ideas, but this one was easy as far as I could just buy it and use it...didn't have to mix things, etc. It worked really good. It was time consuming but I am happy with the results. 
You get Clorox with bleach toilet bowl cleaner and clean your grout with it. I have it pinned on my Pinterest if you want to save it.
Here is a picture of it in progress


Oh, and do not wear pants you want to keep nice. I was doing good for a while, but while I was scrubbing I moved and got it on my pants. Not a happy ending for my pants.

Thanks for stopping by.

Friday, October 31, 2014

Halloween Treats

I found these on ETSY. You purchase a download and it gives you everything but the candy and cellophane to make these. So easy and cute! I made them for the ladies I work with at school. I also bought them in Thanksgiving and Christmas! 


They are cute, huh?

Monday, October 27, 2014

Halloween Treats

Just thought I would share a couple Halloween goodies I made.
I made these little coffins for the ladies I go visiting teaching to.


Then I made a bigger version of the candy box I have made before. I actually made this for my son to answer for a dance. He put candy in it and said: It would be a "TREAT" to go to girl's choice with you.


Thanks for looking!

Wednesday, October 8, 2014

creative ways to ask/answer for date dances

My son came up with his own idea of how to ask. It was kinda funny. He left this on her doorstep. You lifted to see his name.
"Lettuce Turnip the Beet at homecoming."


She answered really cute and with the same idea he started.


Saturday, September 6, 2014

Homecoming idea to ask

Homecoming is coming up. I paper pieced the owl on here. I told him to write "GUESS 'HOO' WANTS TO TAKE YOU TO HOMECOMING". He didn't want to leave the W off. :)
He put the letters of the alphabet in some balloons. The letters that spell his name he put in a different color. 


Friday, August 8, 2014

Crochet Owl


I found the pattern for this little owl by Little Muggles.  I need more practice, but not bad for my first try :)

Tuesday, July 8, 2014

8 x 8 scrapbook album

I made an 8 x 8 scrapbook album as a gift. I haven't scrapped in a long time. It was nice to get back to it again.


Thanks for looking!

Thursday, June 26, 2014

Crochet Reindeer

I made this crochet reindeer. I think he turned out pretty cute.

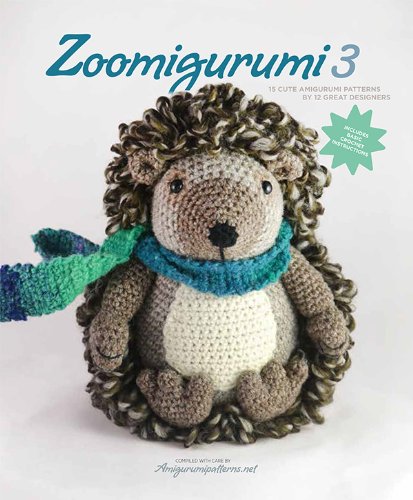
I got the pattern out of this book that I purchased on Amazon

I realized that my stitches were not as tight (I can kind of see the stuffing through the sweater and head) so I made another one and did my stitches tighter.

It is a little bit smaller. Each reindeer has its own personality. I used thicker yarn (for both) than the pattern calls for and a bigger crochet hook. (I used a F crochet hook and wool weight yarn). He is all single crochet with increase and decrease stitches. Not too hard. The front of the book shows you how to do these stitches as well as a magic ring, which you use to start every part of him. The finishing instructions are minimal so it was trial and error for me since I've never made amigurumi before. 

You can get the pattern for just the reindeer without purchasing the book here.
This is what the original reindeer looks like. I changed the colors for mine.
Let me know what you think!